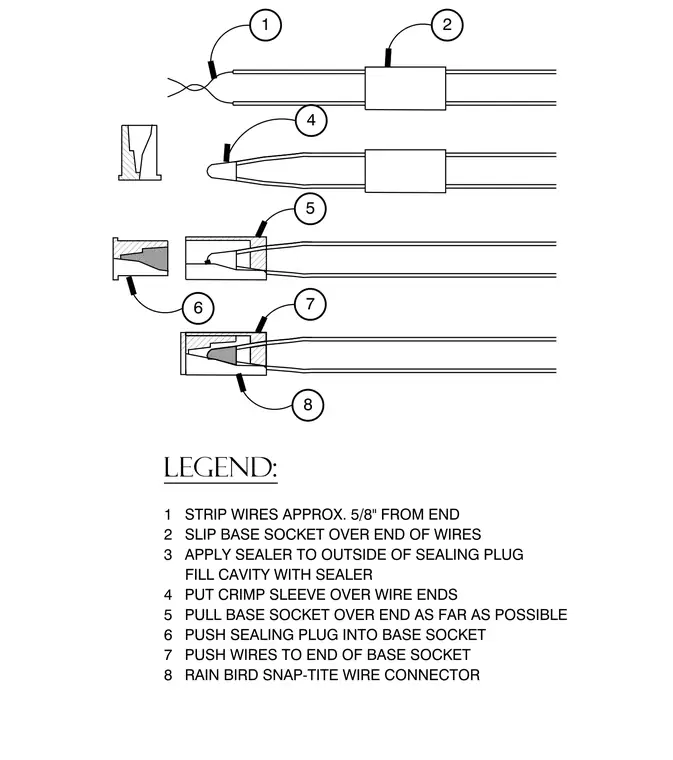
The installation sequence begins by stripping the wires approximately five-eighths of an inch from the end before slipping the base socket over the wire ends. A crimp sleeve is placed over the wire ends and the cavity is filled with sealer. The sealing plug is coated with sealer on the outside and pushed into the base socket. Finally, the wires are pulled into the base socket and secured with a Rain Bird snap-tite wire connector.
7 PUSH WIRES TO END OF BASE SOCKET 8 RAIN BIRD SNAP-TITE WIRE CONNECTOR 6 PUSH SEALING PLUG INTO BASE SOCKET 5 PULL BASE SOCKET OVER END AS FAR AS POSSIBLE 4 PUT CRIMP SLEEVE OVER WIRE ENDS FILL CAVITY WITH SEALER 3 APPLY SEALER TO OUTSIDE OF SEALING PLUG 2 SLIP BASE SOCKET OVER END OF WIRES 1 STRIP WIRES APPROX. 5/8" FROM END LEGEND: 1 2 4 5 7 6 8
Members view this detail in full resolution, download the CAD files (SVG, PDF), and can adapt it in the built-in CAD editor — export DXF, DWG, or PDF.
Start membership